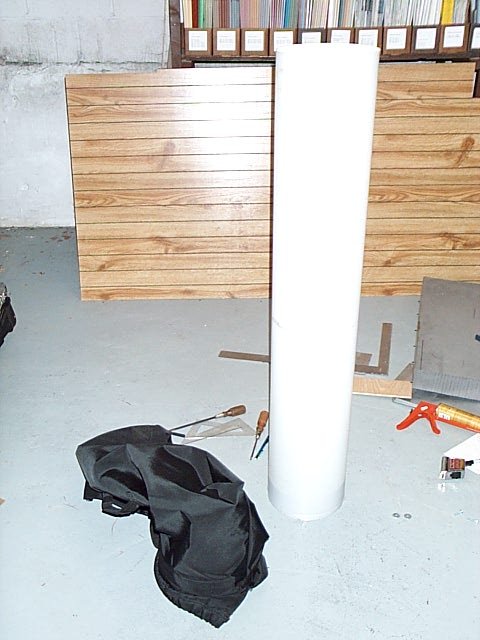
The bag is a simple sheath made from appropriate
cloth, such
as canvas or rip-stop nylon. A cloth handle is sewn at the point where
the case balances with the horn inside. An optional shoulder strap
extends
from one end to the other, and allows the case to be carried either
over
the shoulder or behind the back (semi-backpack style). The Author's
sheath
was made by Donna Altieri of Altieri Brass Pacs, 1 Galapago Street,
Denver CO 80223, phone 303-291-0658 (the tube was sent to her by UPS
for
fitting.)
www.altieribags.com
To give the bag shape and protect the instrument from
banging into obstructions
(and to resist crushing), the bag is sized to slip over a tube rolled
from
1/8" thick high density polyethylene plastic sheet. This is inexpensive
and may be obtained from local plastic supply companies or online from
suppliers such as GE Polymershapes (formerly Cadillac Plastics).
www.gepolymershapes.com
(www.cadillacplastic.com)
The diameter of the tube is made to be slightly less than
the overall
diameter of the bell. The length of the tube is about one inch more
than
the overall length of the instrument, to accomodate the bow pad
assembly
(see below).
|
 |
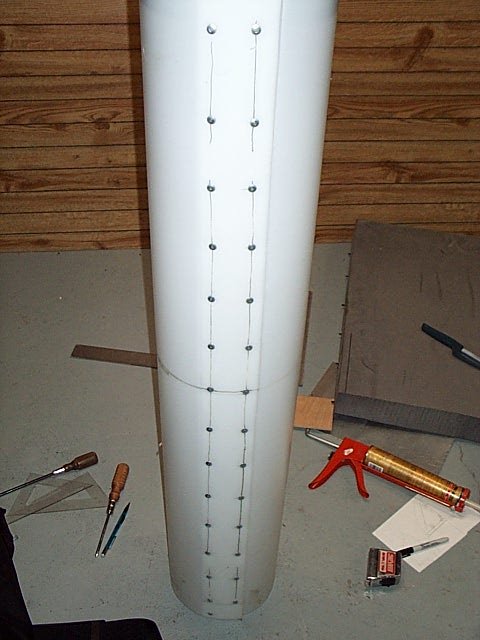
To roll the tube, cut the sheet to size, allowing
about 3"
of overlap as shown in the photo. Use two or three cloth belts with
continuous-
adjust type buckles; the inexpensive belts used by the scouting
organizations
or the military for their unforms work well. Otherwise, any strap or
rope
method that allows the tube to start wide and loose, then be slowly
drawn
up smaller and tighter will work.
Once the tube is drawn up to the correct diameter (double
check this!),
drill appropriate holes in two rows, approximately 3/8" from each edge
of the plastic. The holes should be just large enough to clear the
pop-rivets
or other hardware.
Using two people, one reaching inside and other other
working outside
the tube, secure the hardware in the holes (NOTE: you must use
hardware,
since there is no glue or adhesive that will work with polyethylene
plastic.)
The photo shows aluminum pop-rivets (inserted from the outside, with
washers
used on the inside), but simple bolts, washers and locknuts will also
work.
|
 |
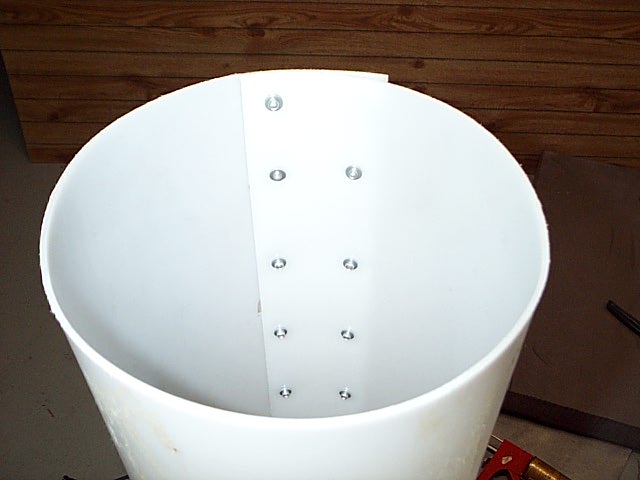
This photo shows the inside of the tube with all but
one of
the fasteners installed. The washers are clearly visible. Whether using
bolts or rivets, select them to be as short as possible to avoid
leaving
objects that will catch on the instrument when taking it in and out of
the tube.
|
 |
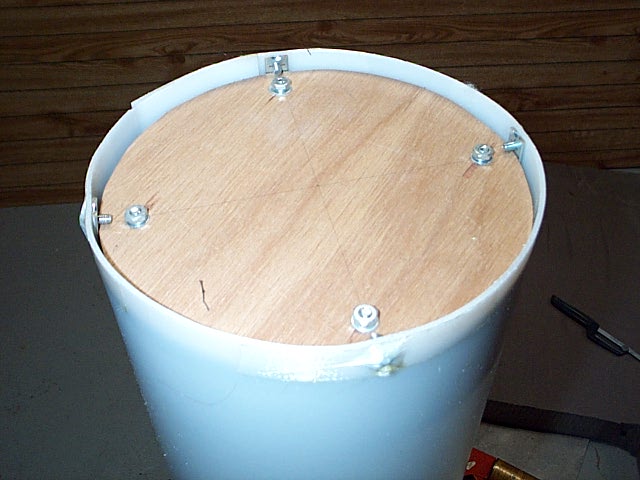
The bottom bow of the instrument will be held in a
centered
position in the bottom of the tube. To provide a firm base for the bow
to rest on, and to provide a glue-friendly surface to attach foam
padding
to, cut a circle of plywood to fit inside the tube. 90-degree metal
brackets
are used with rivets and/or bolts to secure the wood just inside the
end
of the tube. The wood should be no more than 1/4" thickness to save
weight.
|
 |
A pad made from a firm grade of foam is cut to fit
snugly inside
the tube, then cut to fit the contours of the bottom bow of the
instrument;
make allowances for any keys down there! There are a great number of
suitable
foam products which will hold the bow in place on the board; use at
least
a 2" thickness, and select a foam that is stiff enough to keep the bow
from slipping out of its cutout. A resilient foam formulation is also
desirable,
so that it recovers from abuse and will not crumble or tear. Plastics
suppliers
or foam cutting firms can often supply scraps of suitable material. The
prototype used 2-pound closed-cell crosslinked polyethylene in
a
2" thickness. Use RTV silicon adhesive (NOT caulk) or 'liquid
nails'
type adhesive to glue the foam to the plywood.
|
|
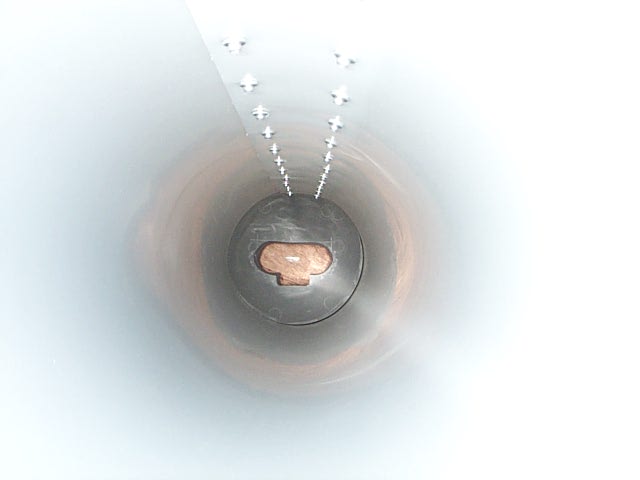
This photo shows the tube inserted into the bag, with
the instrument
inside. Notice how the bell self-centers in the tube. If the tube is
the
correct length, the bottom bow of the instrument will be just touching
the plywood board when the bell rests lightly on the rim of the tube.
The original design does not have any padding for the bell,
but this
can be added by sewing foam rubber to the cloth sheath just where it
touches
the bell rim. Another solution would be to make a short tube slightly
larger
in diameter than the main tube, sized to fit just around the bell, and
fasten it to the main tube, providing a lip that the bell would rest
inside.
|
|
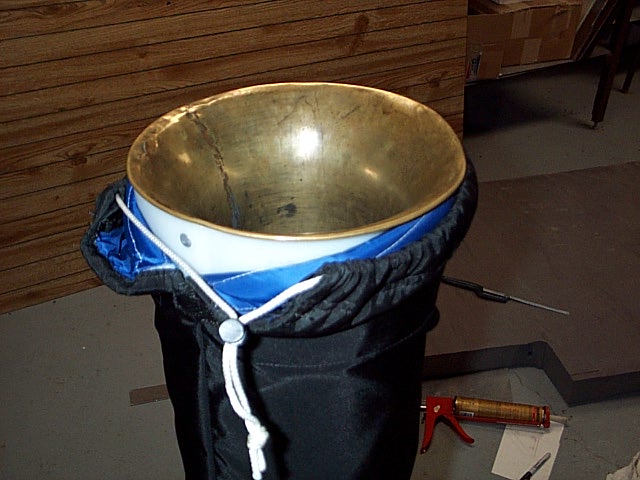
This photo shows the correct cut of the cloth sheath.
With
the tube snugly inside the sheath, there should be just enough extra
cloth
to draw almost to the center of the bell with a drawstring. Provide a
slit
in the sheath starting about an inch below the top of the tube, to
allow
the end to be opened wide when taking the instrument in and out. The
drawstring
and slip fastener are available at fabric stores and suppliers of
camping
equipment. The tightly drawn string holds the bell firmly inside the
tube,
so the instrument cannot move sideways or lengthwise inside the tube.
|
|
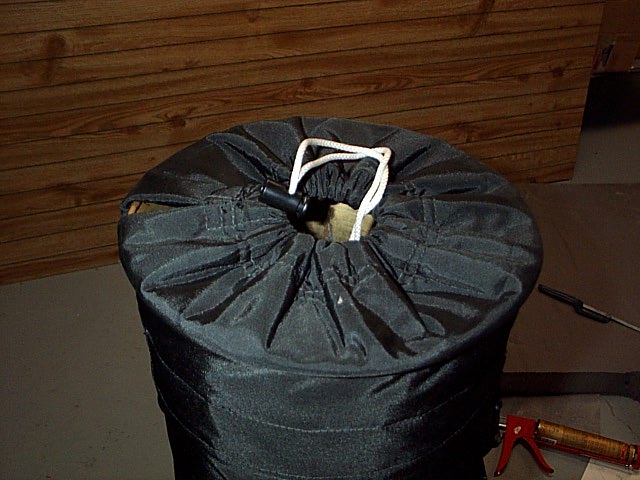
This photo shows the completed gig bag with the
ophicleide
inside. If the optional outer ring is added to the bell end of the tube
(see above), the instrument will be very well protected from abuse in
transit.
Since most ophicleides are narrower than their detachable bocals (some
players refer to these as 'crooks'), it is not possible to size the
tube
to also fit the bocal inside. The bocal can be easily carried
separately
in whatever other bag or case the player might take along (the author
puts
it inside an attache case that primarily holds sheet music.)
The descriptions given here and the
photos
reflect a gig bag in use for almost 10 years, including about 20 trips
by airplane (the gig bag was placed inside a custom made cardboard box,
fabricated by the local packaging store.) However, no guarantee is made
for suitability for a given instrument or travel situation, or for
variations
on examples made from these descriptions.
All photos made using a Kodak DC240
digital
camera.
|

|