The ophicleide's bocal (crook) will be kept in a light-weight
box made from plywood and the same foam used for the pads. The best place
to mount the bocal box is the aluminum valance of the SKB case. The valance
has either a tongue or groove, with the latter having an embedded "O"-ring.
If the valance is drilled through halfway between the lip and the opposite
edge, there is nothing but metal there and the case's integrity will not
be damaged.
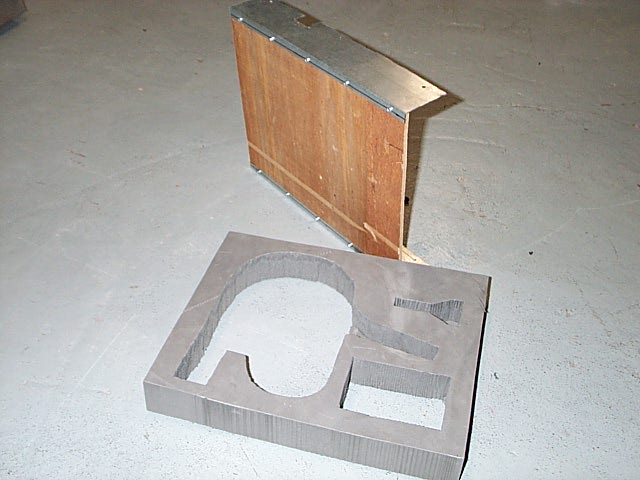
Since the box will have a totally hinged top lid, the box must be mounted
to the valance with sheet metal brackets as shown in the photo. These can
be made from the kind of lightweight tin sheet metal intended for use with
home heating ductwork. The pieces can be easily cut with tin snips or scissors,
and bent over the edge of a table. Each bracket is bolted to the valance
with three 8-32 bolts secured with locking nuts.
|
 |
The folded edges of the two brackets are attached to the 1/4"
plywood using short (3/8" or less) sheet metal screws (much better for
this than wood screws, and the head style is better suited for use with
the tin.) The screws will protrude through the other side of the wood,
but the foam will cover the points; they may optionally be ground or filed
flush with the wood.
A piece of 2" foam, the same kind as used for the pads, is cut to exactly
fit the wood and bracket assembly. Note that the brackets must me made
to a width equal to two thickness of the plywood plus the 2" foam. This
total thickness will fit perfectly inside the case shell; any shorter would
not be deep enough for the bocal, and deeper would cause the bottom of
the box to hit the inner wall of the case shell.
|
 |
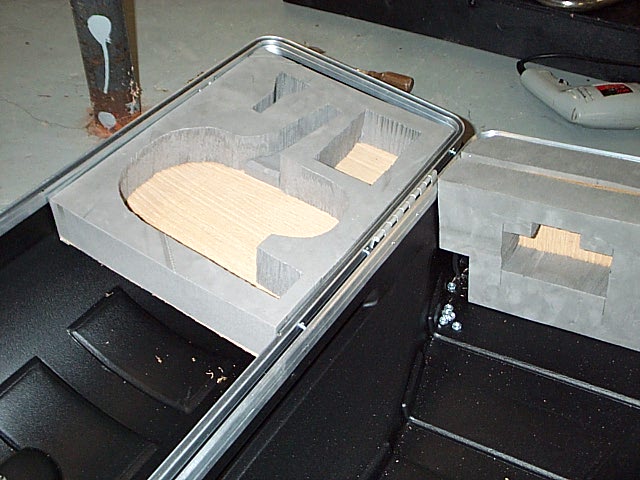
This photo shows the wood & bracket assembly test fit with
the case and the foam insert. Note that the cutouts in the foam are shaped
to the outer contours of the bocal, mouthpiece and accessories (neck strap,
etc.) In the case of the bocal's mouthpipe (also called the mouthpiece
receiver) and the mouthpiece cutouts, after the overall shapes were cutout
these sections were trimmed down and glued back into the foam to reduce
the depth. These curved cutouts are done easily by first drilling a 1/2"
hole in the foam, then inserting a hand-held hacksaw blade and following
a marked line.
Note how the foam is about 1/4" short of reaching the edge of the aluminum
valance and brackets; this space will be used by the lid.
|
 |
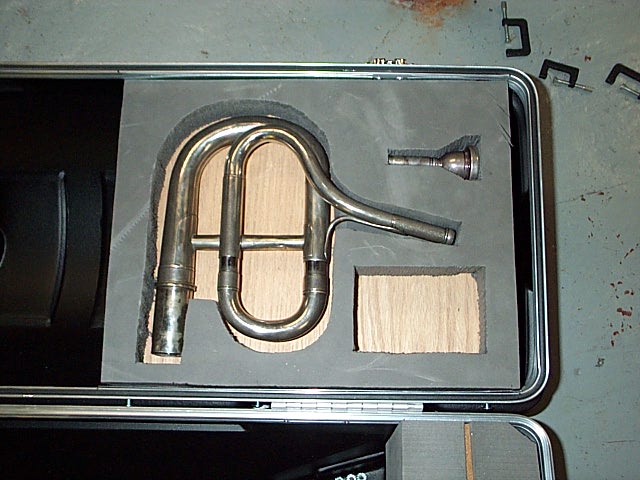
This photo shows a test fitting of the bocal and mouthpiece.
In this view, the inserted foam section below the bocal's mouthpipe is
clearly visible. Also look at the mouthpiece; the shank is held up away
from the plywood by another inserted piece of foam which tapers from the
shank end to the mouthpiece rim.
Also suggested by this view but not visible; the latch at the upper
right corner of the case has mounting hardware that interferes with the
box bracket. It is necessary to cut a small notch from the bracket to clear
the two bolts.
|
 |
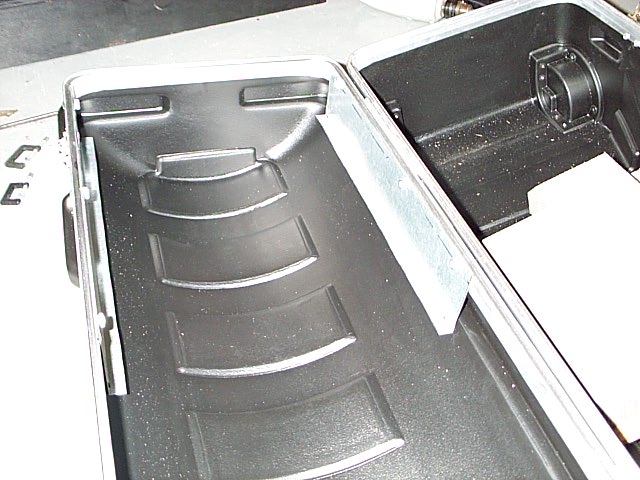
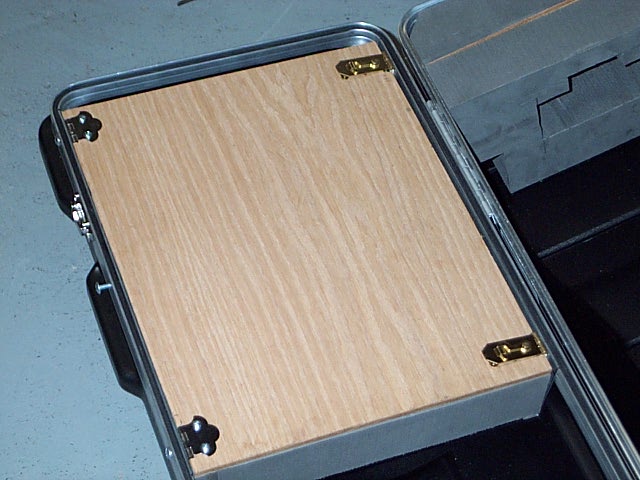
This photo shows a test fitting of the box lid and its hardware.
The lid is hinged as shown so that it opens away from the player when the
case is open. Note that the top of the lid is flush with the edge of the
valance; this way it does not extend so far as to impact the bow pad assembly,
but rather contacts that pad lightly so the pad prevents the lid from opening
in transit. This feature also allows simple latches to be used for the
lid, since they do not need to be very reliable or heavy-duty.
The hinges and latches are bolted to the valance. In the author's case,
all were drilled and tapped to accept the 8-32 bolts that also secure the
box brackets to the valance, i.e; the hinges and latches become the nuts
that the bolts screw into. If tapping tools are not available, the previously
mentioned lock nuts can be used instead.
|
|
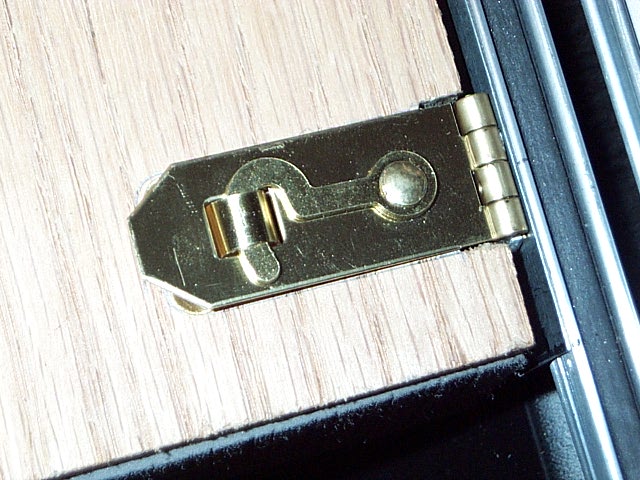
This photo shows a close-up view of the latch. This is an inexpensive
brass type available in hardware stores. It has a very low profile so that
it does not impact the bow pad assembly.
|
|
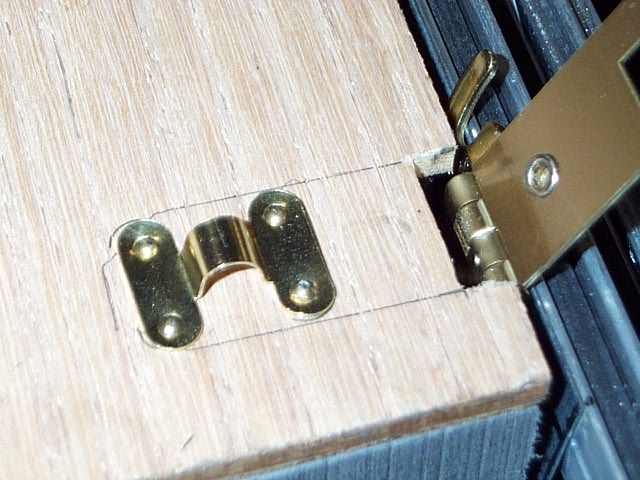
This photo shows the latch in the open position. The loop of
the latch attached to the lid with four tiny nails. For added security,
the points of the nails which protrude through the wood are bent over and
hammered flat.
Note the notches which are required for the hinge pin section of the
latches.
|
|
This photo shows the finished bocal box with the lid open.
'Liquid nails' adhesive is useful to glue the foam section into the wood
& bracket assembly.
All photos made using a Kodak DC240 digital
camera.
Goto next chapter
|

|