When gluing the four trapezoids to make the tube, they must be held
firmly together over the entire length, they must be kept straight without
a twist, and the whole assembly must stay in alignment. The individual
trapezoids will be quite floppy, and without help will bend every which
way.
To facilitate the gluing, two sets of 'jigs' must be made from left
over plywood. A set of thicker 'inner jigs' will prevent the trapezoids
from falling inwards; the rabbet joints will do the rest in this regard.
Another set of 'outer jigs' will keep the assembly aligned, and will also
help keep the pieces together while the glue sets.
|
|
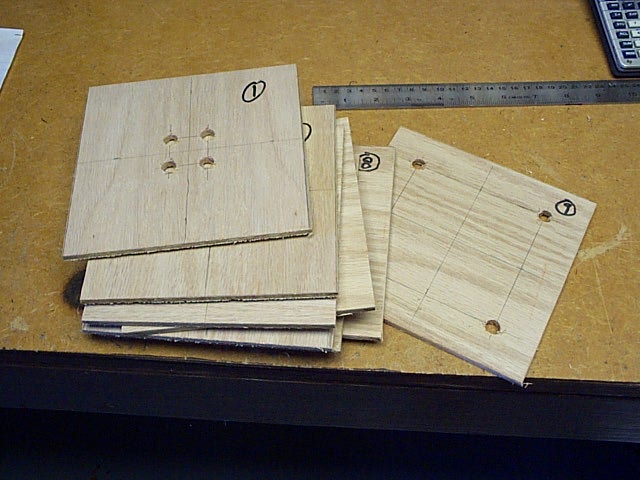
The outer set consists of nine jigs, each made from a 6" x
6" piece of plywood. They will be located evenly along the length of the
tube, with the exception of the two on the ends, which must be slightly
inwards. Centered on the jigs are square cutouts, sized progressively to
match the outer dimensions of the tube at their respective locations.
Before sawing the inner cutouts, drill holes at the corners. This will
assist the sawing, but more importantly the clearance they afford will
prevent conflicts with the corners of the tube. Also, this clearance keeps
excess glue that squeezes from the rabbet joints from adhering to the jigs.
|
|
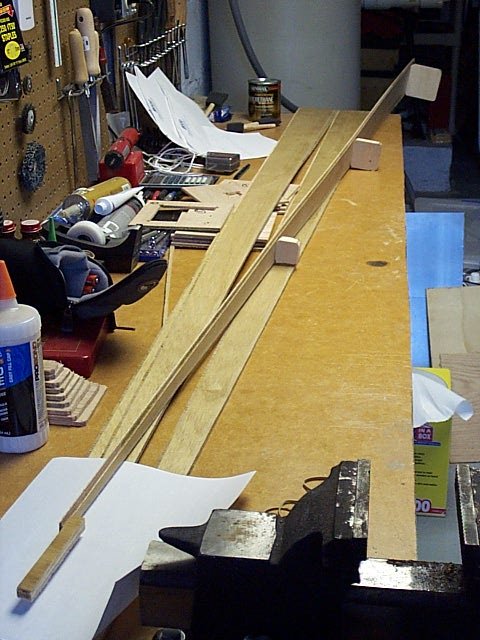
This photo shows the trapezoids being held together by the
outer jigs, as part of a test fitting prior to actual gluing. The utility
of the corner holes is clear from this view.
As long as the tube is glued together while the jigs rest on a flat
surface, the resulting structure will be straight and true.
This photo also shows how floppy the trapezoids can be. Note that while
the jig holds the pieces together at one point, the pieces start to separate
a few inches away. For this reason, tightly wrapped and twisted steel wire
will be used as the primary tightening method.
|
|
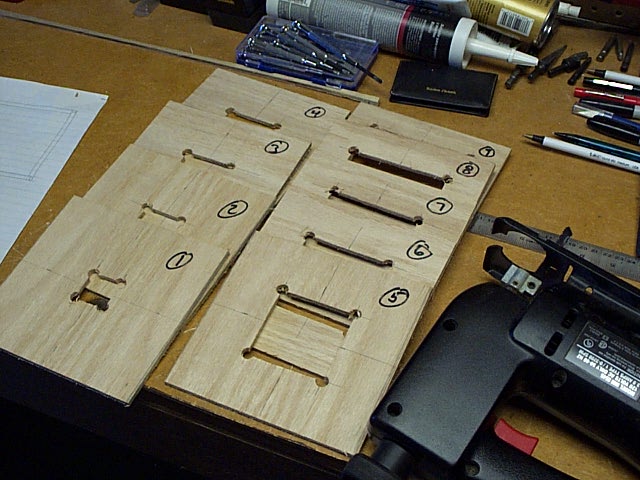
The inner set consists of four jigs, three of which are made
from thicker pieces of wood; the fourth will be a 1/2" dowel rod. Use 1/2"
or
3/4" plywood or other board if available. Otherwise, a few pieces of scrap
from the main plywood sheet can be glued together to make thicker pieces
for this purpose.
These jigs will be spaced evenly along the length of the tube. They
will need to be attached temporarily to one of the trapezoids. During fabrication
of the prototype, the inner jigs were stapled to the trapezoid.
Note that this photo shows a piece of plywood attached to the small
end of the trapezoid; ultimately this was replaced with a short section
of 1/2" dowel prior to gluing. The dowel was taped in place instead of
being stapled.
|
|
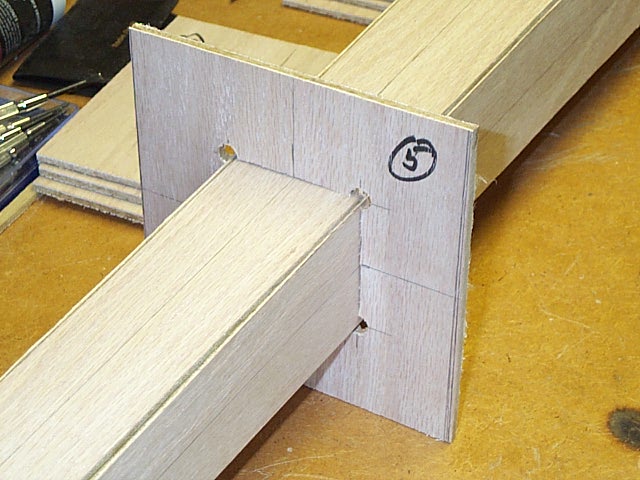
This photo shows one of the inner jigs in place, stapled to the trapezoid.
Note that only one trapezoid will be stapled to the inner jigs! Without
the staples, the inner jigs would shift and prevent proper alignment of
the pieces during the critical gluing process. Also, the jigs might possibly
fall over, ruining the whole thing.
As with the outer jigs, the inner jigs need to have clearance at the
corners in order to avoid conflicts and inadvertent glue bonding to the
trapezoids. The corners of the jigs have been sanded to a rounded shape.
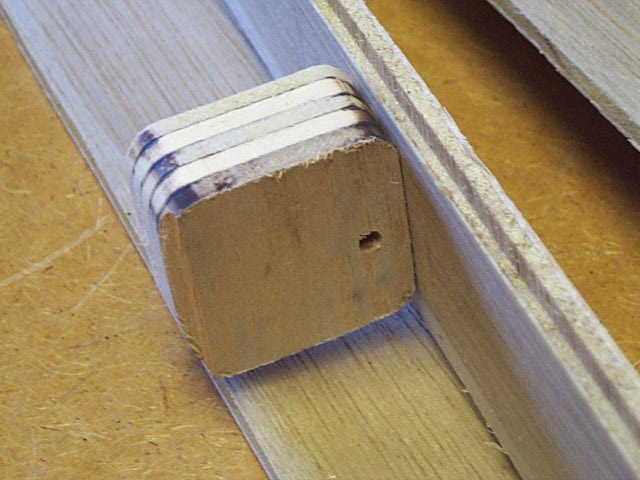
A hole must be drilled in each of the three square shaped jigs; the
photo shows the hole off-center, but experience dictates that a centered
hole will be better. A length of cord will be fed through the holes and
knotted, with some slack between each jig. After gluing, the inner jig
staples will be pulled out, and the inner jigs will be extracted from the
tube by tugging on the cord.
|
|
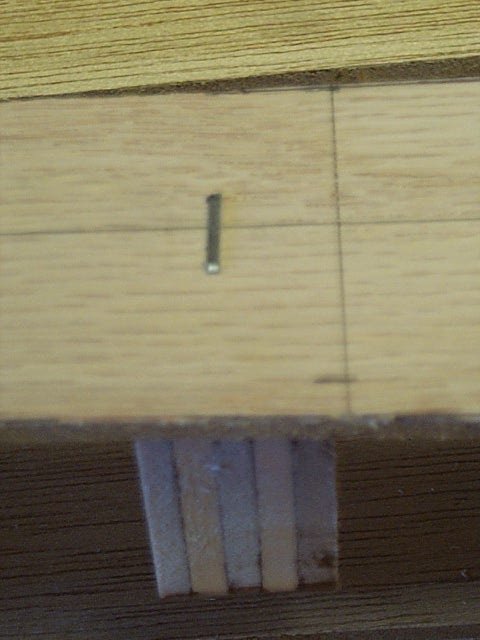
This photo shows the staple holding one of the inner jigs in
place. A pair of small nails would also work (one nail alone would allow
the jig to twist); make sure to use nails with flat heads, so that they
can be pulled easily..
After gluing, the staples will be pulled, and their holes filled by
rubbing wood glue into them.
Visible here is the asymmetrical shape of the trapezoid. The center
line, marked in pencil, defines the true center of the tube, but the wood
extends further to one side as part of the rabbet joint structure. When
positioning the inner jigs, make sure that they are aligned accurately
relative to the true center line. The previously mentioned test fitting
is important in verifying this alignment.
All photos made using a Kodak DC240 digital
camera.
Go to next chapter
|
|